Servo Motor Control & Tone Output
- yz7720
- Sep 28, 2021
- 1 min read
1. What is a Servo Motor and how it works
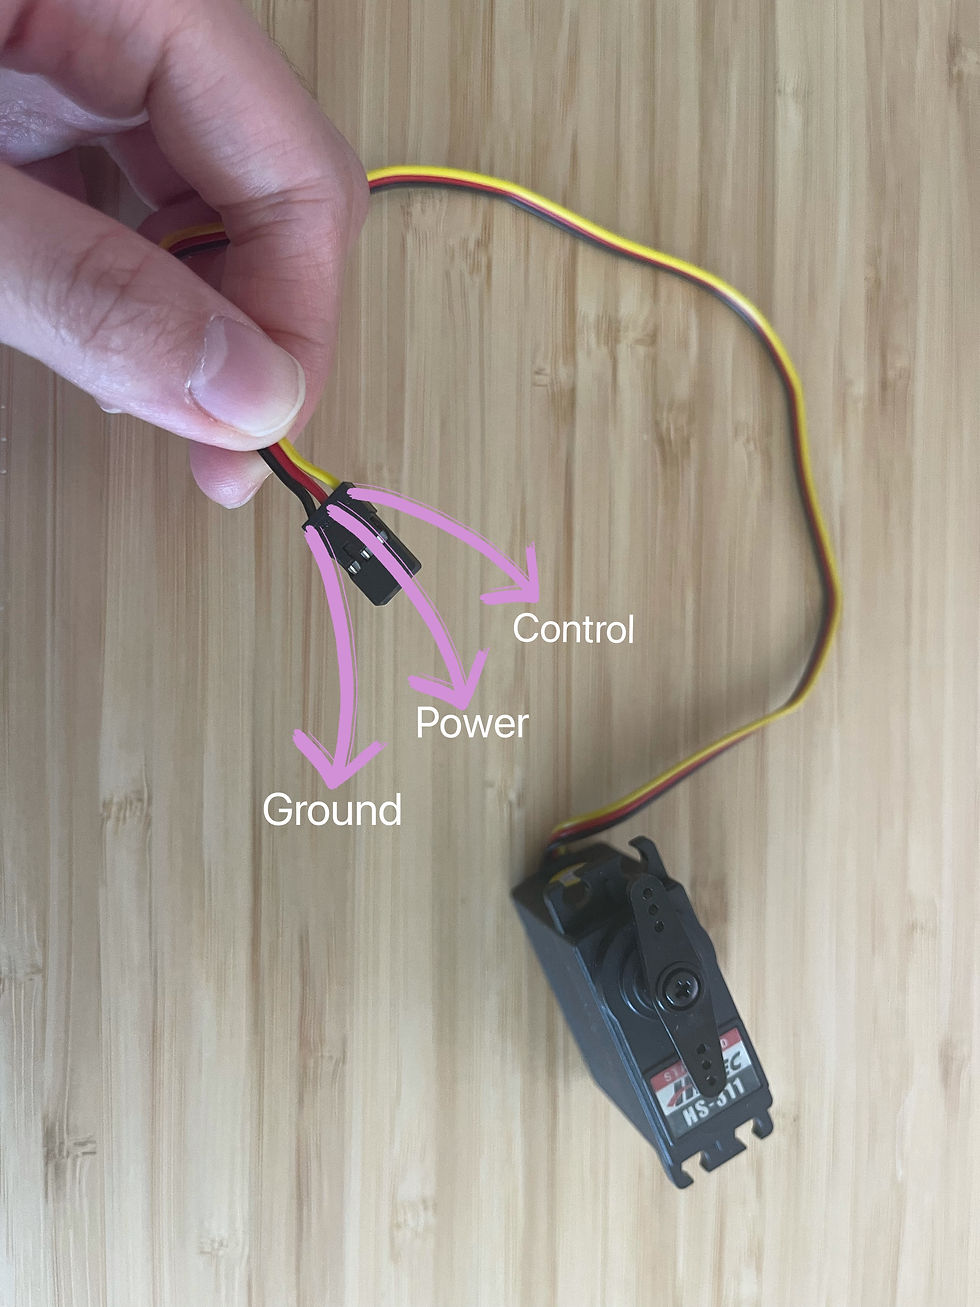
Servo Motor is great for repeatable precision movement, and they come in 3 sizes: micro, standard and jumbo. The one we will be using is the HS-311 Standard Servo Motor for the lab. It is controlled with 3 wires: power(usually 5 voltes), ground and control. Control is done via PWM or pulse width modulation. As for the coding part, we need to add Servo from Sketch>Include Library>Servo. One thing to note is that Servo expect to pulse every 20 millisecond, so we have to set delay(20) for the Servo to turn smoothly.

I tried to do analog output with Arduino Uno using the servo and the potentiometer. The below is what I get from writing delay(20) for the coding part.
The below is what I get from writing
if (millis()%20<2){
myServo.write(angle);
}
Question: If they are doing exactly the same thing, why do we prefer to write
if (millis()%20<2){
myServo.write(angle);
}?
I don't really understand what does it mean that we don't need to wait for 20 seconds if we write the code this way instead of delay(20)?
2. Analog input sensor and servo
Question: Is it normal to have the weird glitching when I were not touching the FSR??
3. Connect the Sensors and the Speaker
Question:The FSR didn't work on my Nano but worked on the UNO, is it because this whole circuit requires more than 3.3 voltage?


Comments